Table scraps, to help me remember ideas in the future.0


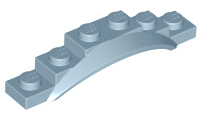
Apparently those white things are called mudguards? I knew they went over tires originally, and then over windows. I just have them sorted away in the box labeled "strange arches", which apparently includes other mudguards which I though were arches, like this one:


And I still might some day. I don't have any in-focus photos of the slopes to put on the ends of the petals to make them less chunky, but I had a plan. But creativity is strange and takes you from one place to another without any care for how you might feel about it. I might get back to it someday. Maybe.
But then I got on a tangent of playing with the shorter, taller mudguards. But I really don't have enough pieces to make anything too substantial. I think a future bricklink order will include some.


So many possibilities. I just need some more, I guess.

Here is the pink flower quilt square I made for the convention. I was making 16x16 squares, so it had to fit into that space. It was a close call.

This was a rough one. I like the final result, but it wasn't the easiest to get to.
First the petals and try to fill it into the frame. (A 16x16 frame to add to my pattern sampler quilt idea.)


I didn't have enough dots in the right colors so I had to mix up various ones. And then the petals with the white dots hit up against the frame. So then I decided the frame needed a dot in the middle on the one side that didn't have a petal, just to balance it and be decorative. So three of those white dots are doing double duty, as a tip of the petal and also a decoration on the frame.
Now I want to go make quilts...The last few days before the convention, I learned that I would have an entire table just for myself. I had a panic, decided I needed to make as much as possible, and started copying stuff I had done before. This is one I copied from before.

Here's the album that has the previous attempts.
It turns out that those cheese slopes are fiddly and need to be placed in a certain way. Here is a close up of the way that worked. I had to take care to copy it correctly. If a cheese slope gets put in backwards, it gets very cranky.

Here's another copy of stuff from long ago:


I think this was the first thing I made for the convention. The first thing put into a 16x16 pattern square block. I realized after the fact I'd made something very similar before, but oh well.
I stuck those ball joint pins in there to fill a gap and to maybe add a decorative flair. Which makes me wonder: what all could be added in? Probably just about everything.
I really need to figure out how to adjust photos on the PC in the same way I can on a scanner. Hmmm.
Here it is at the convention:


Dots are so much fun! There's so much to do with them. I'm just getting started with learning about all the possibilities.
These first two I made as "quilt squares" for my original idea of having a quilt-like pattern sampler for the convention. The rest are table scraps. I could make endless amounts of table scraps.


