Introduction to Headlight Brick Patterns
Headlight bricks are an essential ingredient for making many different patterned mosaics. Their unique shape allows for them to be pushed together into a "headlight brick square". This is an ideal starting point for pattern building. Headlight brick squares can be pushed together, and by using different colors of bricks, you can make many different patterns. It is also possible to add other bricks inside of or in between the headlight brick squares, creating more complex patterns.
Part 1: How to make a headlight brick square
Brendan Powell Smith (author of The Brick Testament) has spent a lot of time exploring the different patterns that can be made with headlight brick squares. He made this step-by-step guide on how to make the square (used here with permission). Each headlight brick square needs four headlight bricks, which are pushed together as shown in Steps 1 and 2. Multiple headlight brick squares can then be pushed together to make larger units, as shown in Steps 3 and 4.
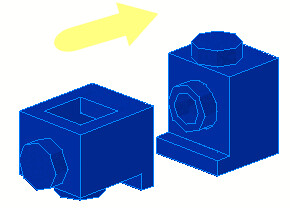 |
| Image 1: Step 1, courtesy Brendan Powell Smith |
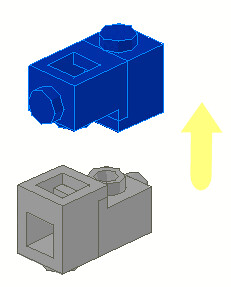 |
| Image 2: Step 2, courtesy Brendan Powell Smith |
 |
| Image 2a: Step 2a, courtesy Brendan Powell Smith |
 |
| Image 2b: Step 2b, courtesy Brendan Powell Smith |
 |
| Image 3: Step 3, courtesy Brendan Powell Smith |
 |
| Image 4: Step 4, courtesy Brendan Powell Smith |
 |
| Image 4a: Step 4a, courtesy Brendan Powell Smith |
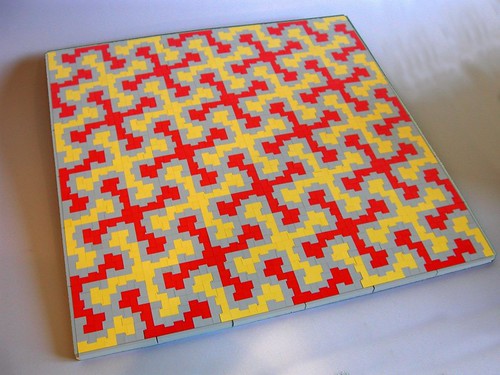
Using different colors in the headlight brick squares will yield many different patterns. When I first experimented with these patters, I would make a single unit of the square, using two colors, and then tessellate them in different ways. Each of the patterns in Image 5 are made with the basic 2-color headlight square shown in Image 2b. However, changing the orientation in which you put them together (Steps 3 and 4) will result in many different patterns.
 |
| Image 5: Two-tone headlight brick variations, by Katie Walker |
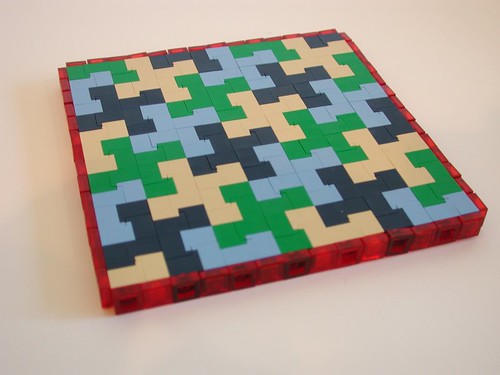
The number of color variations and possible patterns is endless. You can see some more examples in Images 6, 7, and 8. You can also see how to frame the headlight bricks patterns that are created. The outside edge of a headlight brick pattern consists of one outwards-facing stud, followed by an inwards-facing stud. You can stick regular bricks and plates onto the outside of the pattern (as shown in Image 5), alternate inwards-facing and outwards-facing plates and tiles (as in Image 8), or use some combination to fit the needs of your specific project.
 |
| Image 6: Pattern 05, courtesy Brendan Powell Smith |
 |
| Image 7: Pattern 06, courtesy Brendan Powell Smith |
 |
| Image 8: Pattern 04, courtesy Brendan Powell Smith |
Part 2: Expanding on headlight brick square patterns
Once you have mastered the basics of making a headlight brick square, there are an infinite number of ways to expand upon it. Some of ways of doing this are to insert other bricks (such as plates and different sizes of slopes) between the bricks that make up the headlight brick square, between the different headlight brick squares, or both. As different elements are added into and in-between the headlight brick squares, there will be empty spaces that will appear. These can be left to add texture and openings, or filled with other elements. Cheese slopes and 1x1 plates often work well to fill these holes, but it will depend on the size of the gap and the purpose of the pattern.
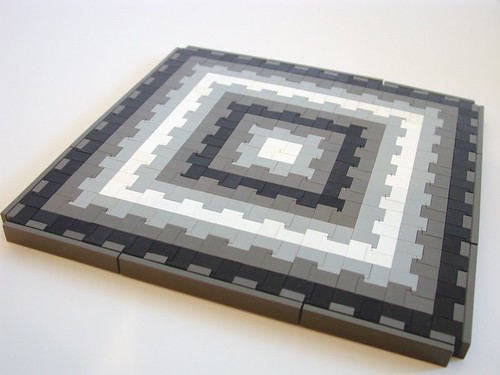
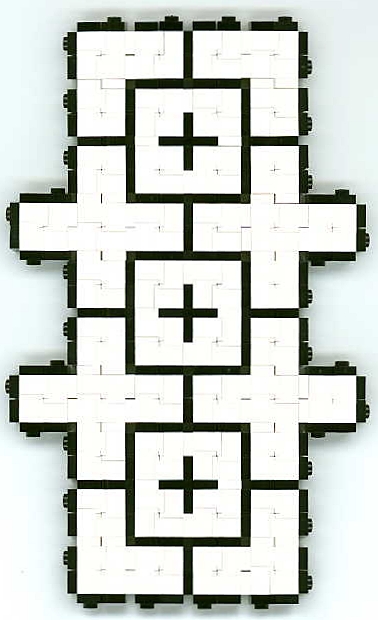
Image 9 shows an example of using black and white 1x1 plates in between solid white headlight brick squares. This method leaves gaps at the center where the 1x1 plates meet together, but by using the color black, these gaps are hardly noticeable.
 |
| Image 9: Floor Study, by Katie Walker |
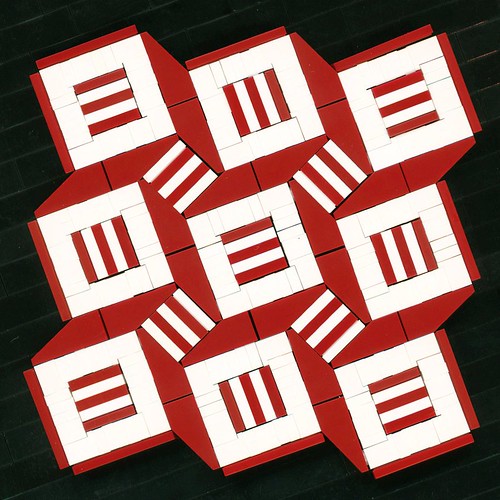
As you can see in Image 10, adding more 1x1 plates between the headlight brick squares will create larger gaps. The gaps in Image 10 are squares the length of three plates on each side. This is a difficult shape to fill with other pieces.
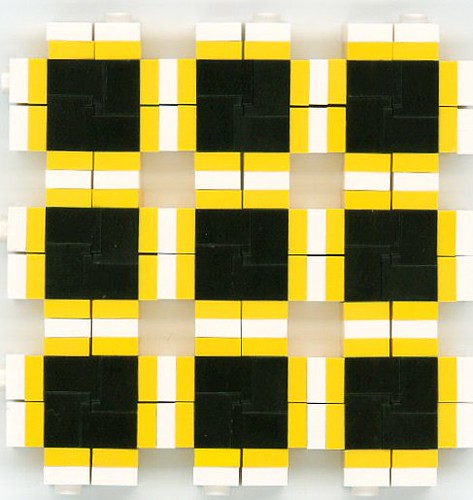 |
| Image 10: Squares, by Katie Walker |
In Image 11, the number of plates between the headlight brick squares has been increased to five. In this image, the headlight bricks are trans-clear. In between each part of the square there are 5 1x1 yellow plates. This will leave gaps with each side being two studs long. This is a great size for filling with cheese slopes or four 1x2 plates topped with tiles, among other possibilities. For more information on filling gaps with cheese slopes, check in the references for the article "Cheese Slope Mosaics: A Tutorial."
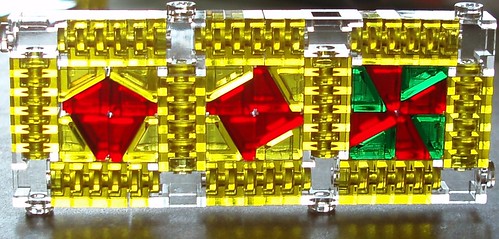 |
| Image 11: Expanded headlight brick squares, filled with cheese slopes |
There are many other ways of expanding on headlight brick squares. Image 12 shows headlight brick squares which have been expanded with 5 1x1 plates, as shown in Image 11. But in between each of those squares are two 1x3 slopes. Doing that leaves many of the 2x2 stud squares, which in this case have been filled with a stack of 1x2 plates (alternating colors) topped with a 1x2 tile.
 |
| Image 12: Squares and Parallelograms, by Katie Walker |
There are many other ways to use headlight bricks and headlight brick squares to make many different kinds of patterns. Although advanced headlight brick pattern-making (such as in Image 13) is outside of the scope of this article, you can find many different examples of these patterns in the flickr photo sets listed in the references.
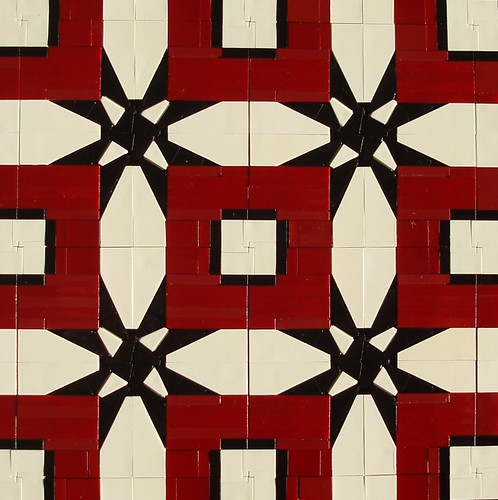 |
| Image 13: Color Variation 1, by Katie Walker |
References
Brendan Powell Smith's set of headlight brick patterns: http://www.flickr.com/photos/12247552@N08/sets/72157624122077446/
Katie Walker's set of headlight brick patterns: http://www.flickr.com/photos/eilonwy77/sets/72157637281961646/
Headlight Bricks photo gallery on flickr: http://www.flickr.com/photos/eilonwy77/galleries/72157634366152754/
"Cheese Slope Mosaics: A Tutorial" by Katie Walker. Published in HispaBrick Magazine, Issue 014. Also found online at: http://mosaicbricks.blogspot.com/2012/06/cheese-slope-mosaics-tutorial.html
No comments:
Post a Comment